
Virtual Tour of Sienna Van Build
The beast.
Thank you for reading this week’s Virtual Tour of Sienna Van Build.
Anyone who reads these posts on a regular basis knows that I have been working on a camper van conversion since purchasing the Sienna. I’m finished! thank you for your patience!
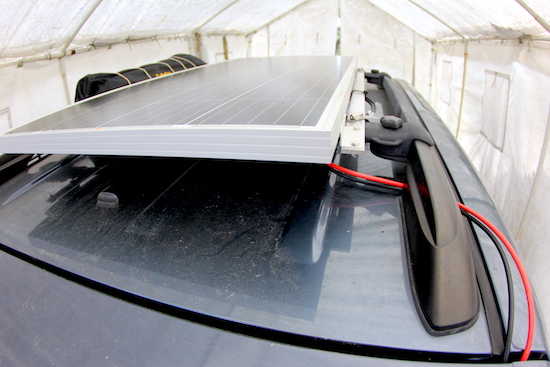
The solar panel supplies the power.
As you peruse the photos, keep in mind that I don’t have any sort of shop. I do have a rickety folding table and a couple of c-clamps, as well as a skil-saw, an electric jig saw, and an electric sander. And an electric drill, that was real important.

The power feeds into a charge controller.
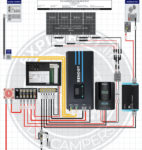
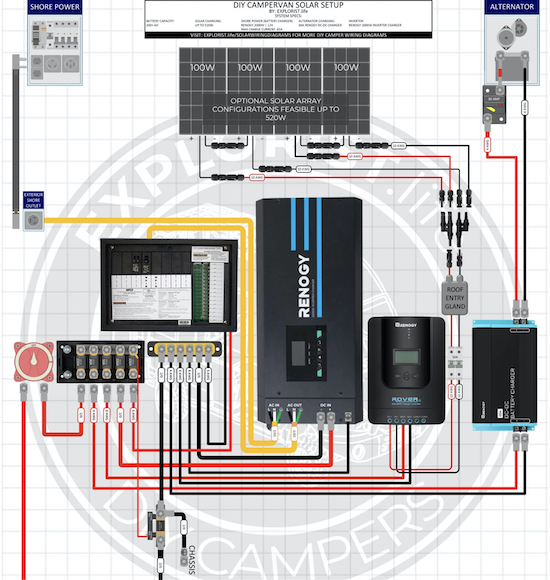
On the roof is mounted a 200 watt, 12 volt solar panel from Rich Solar. Wires feed the generated current into a Rich Solar charge controller. From there a steady 12V current feeds into a positive busbar, which routes the energy to whatever circuits might be active (lights, fans, refrigerator, 12V sockets) or charges the auxiliary battery, or both. Or it might go into a Renogy inverter and get changed from 12V DC to 120V AC, for charging computers and i-pads, running an electric shaver, or what-have-you.

The positive busbar feeds power to the battery and to the 12V circuits, including the Dometic refrigerator. The inverter is under the busbars, hidden from view by the fridge.
There’s also a cable from the battery to a Renogy DC to DC charger, so I can charge my auxiliary battery from the car’s alternator.
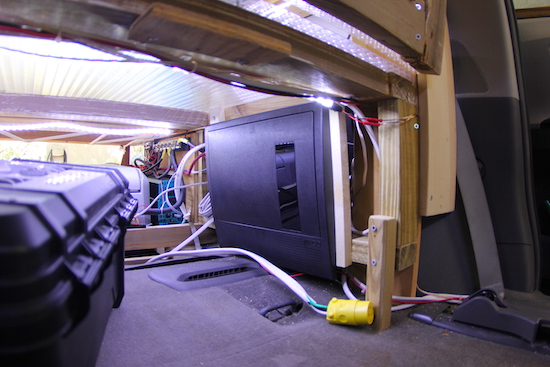
The electrical distribution panel, full of fuses and two circuit breakers. We’re under the bed here. The yellow plug is the shore power line. There is an LED strip under here, too!
Again, I used a wiring diagram I got from ExploristLife.com. The only difference is that Nate uses his panels to charge four auxiliary batteries. He’s got a beefier vehicle than I, however. My thoughts were, if he uses these gauges of wire for a 400 watt system, they are way more than adequate for mine.
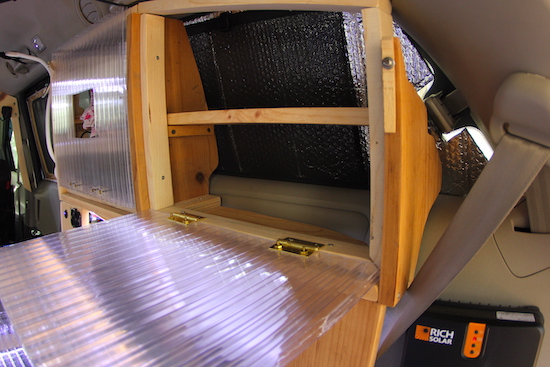
The rear cabinet, passenger side. Light strip underneath.
I have lots of fuses and circuit breakers in that wiring. And a fire extinguisher in the van!
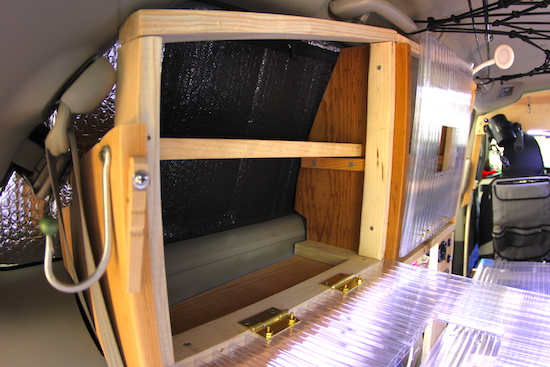
The rear cabinet, driver side. Light strip underneath.
Lights- I have seven separate light circuits. Five of them are LED strips, two are LED reading lamps.
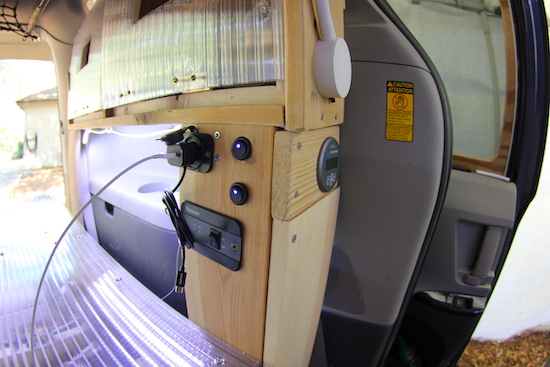
Switches and 12V plug, driver side. Top switch for under cabinet light, middle switch for under bed light, bottom switch controls inverter.To the right of the switches find the battery gauge. Above that is the reading lamp base. Below the gauge is a power strip, but I took the photo before installing the strip.
12 Volt plugs. There are five separate circuits for 12V plugs. Two of them are dedicated to our fans. The other three are for charging devices with a USB adapter plug.
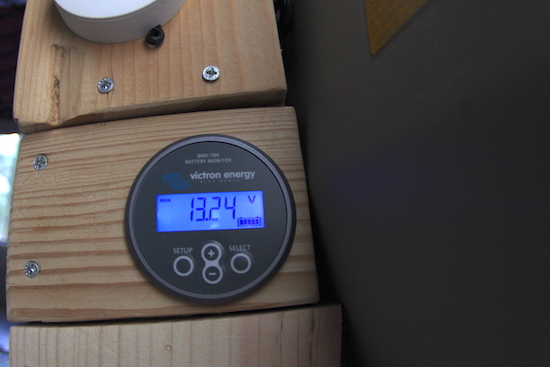
Battery monitor.
There’s a battery monitor, analogous to a fuel gauge on a vehicle.
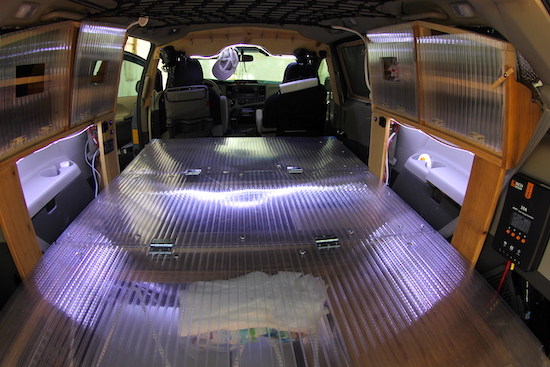
Looking in from the rear.
Under the rear bumper is a plug for plugging into the grid. I carry an extension cord.
Looking back from the sliding door.
Mounted inside the vehicle at the back of the driver side sliding door is a power strip that either plugs into the grid power or the inverter, for using devices requiring 120 volt AC power.
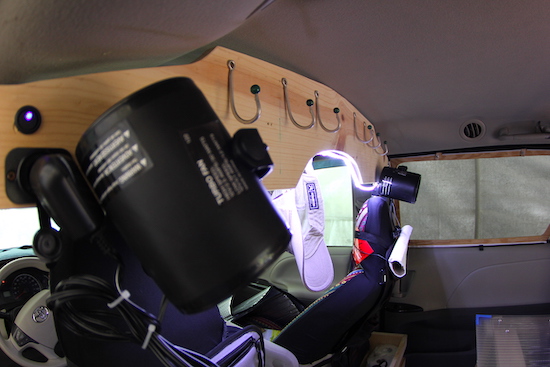
A headboard makes use of formerly unusable space, with lots of hooks for hanging things. At each end are our fans, those black things. And another light strip.
There are four small cabinets. There are plenty of hooks for hanging things.
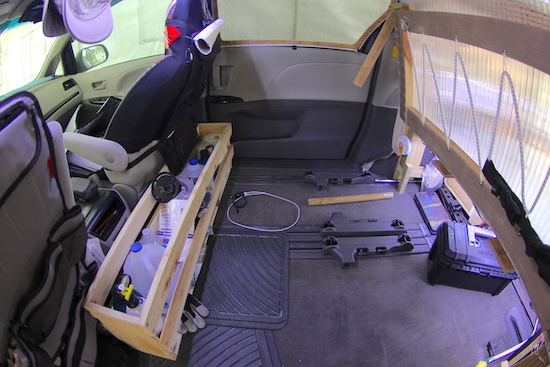
The water box, filled with odds and ends. The front end of the bed is folded up.
I built a wooden box, for carrying bottles of water. It holds four one-gallon bottles and a five-gallon jug.
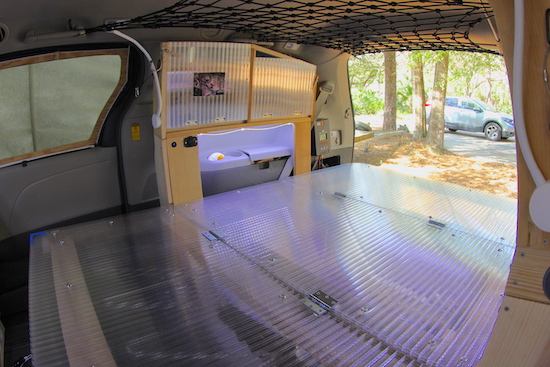
Of course there’s the bed, but the mattress is not in the van in these photos.
There’s also a little port-a-potty for buggy night-time urges.
We’re ready to pack it up and go.
Thank you for reading this week’s Virtual Tour of Sienna Van Build!
Life is great and I love life!
Every day is a blessing. Don’t waste it- Go fishing! or walk on a trail!
John Kumiski, author of Fishing Florida by Paddle- An Angler’s Guide
Purchase a signed copy of Fishing Florida by Paddle- An Angler’s Guide at http://www.spottedtail.com/fishing-florida-by-paddle/
All content in this blog, including writing and photos, copyright John Kumiski 2021. All rights are reserved.
Recent Comments