
Tying the “Synthetic Minnow”
This page tells you how to go about tying the synthetic minnow!
When I first started tying flies, around 1960, there were very few synthetic materials. The first ones I used were mylar (maybe??) icicles filched from our Christmas tree.
Time, and progress, marches on. The array of synthetics with which to tie flies has become almost overwhelming. You can use blends of synthetics to tie spectacular minnow patterns in a beyond rainbow of color combinations!
Fibers
To tie the fly shown in the photos below, I used Kinky Fiber*. You could substitute Yak Hair, Kanekalon, Ghost Fibre, EP Fiber, and probably several others with which I’m not familiar, with similar results. I think finer fibers are better for smaller-sized flies, coarser fibers for larger ones. Keep these things in mind as you follow the instructions.
Go with the fibers that work best for you!
*Researching for links for this piece, I could only find Kinky Fiber (and Comes Alive) on eBay. So the tyer will be forced to use other materials, since Kinky Fiber apparently is no longer available. None of the links here are affiliate! Links are provided only for the reader’s convenience.
Hooks and Tools
The same thing can be said of hooks. This fly is tied on a Gamakatsu SC-15. Other hook companies have equivalent models. Use what works best for you!
I use a Regal vise and tools made by Dr. Slick. These products are incredibly high quality and I recommend them wholeheartedly, but use what works for you.
Synthetic Minnow Tying Instructions
Note to Tyers- in the instructions below, “back” refers to beyond the bend of the hook, “forward” refers to towards the eye of the hook.
Materials
hook- Gamakatsu SC-15, #1. I tie these flies from #4 all the way up to #4/0, same techniques.
thread- Danville flat waxed nylon. Match thread color to fly color. Use whatever thread you like.
wing material- Kinky Fiber or equivalent.
red accent- Comes Alive, three strands doubled, or equivalent.
flash- Wing ‘n’ Flash, or equivalent, whatever color(s) you need.
1. Hook in vise, start thread, work to start of hook bend.
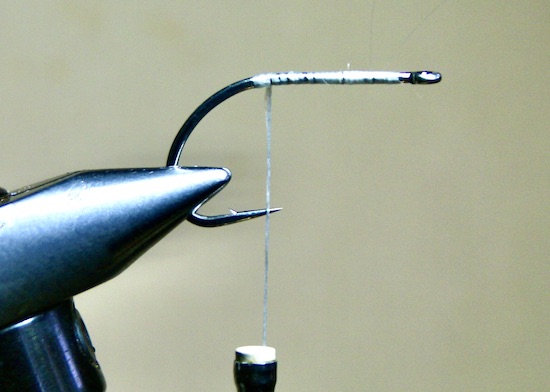
Secure hook in vise, start thread, wind it to the hook bend.
2. Cut a sparse clump of fiber for the “tail.” It’s easy to use too much!
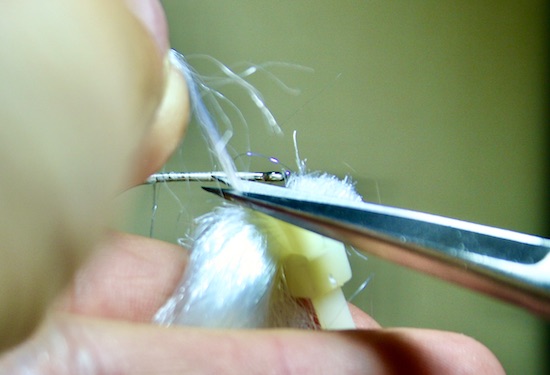
Cut a sparse clump of material as close to the zip tie as possible.
Lie the clump on top of the hook shank, with a length about 3X the length of the hook shank extending past the bend, and the rest extending forward past the eye of the hook. Make five or six wraps of thread around the clump at the start of the hook bend.
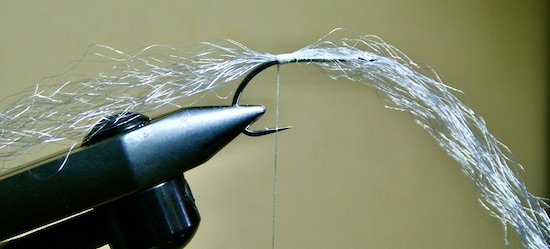
With a piece 3x the length of the shank extending behind the hook, tie it in.
3. Bend the fibers facing forward back over the ones extending past the bend of the hook. These fibers should extend beyond the first ones. Make five or six wraps of thread to hold them in place, and make enough wraps to get a smooth taper. If you want a durable fly, half hitch or whip finish (better) these wraps and hit them with cement.
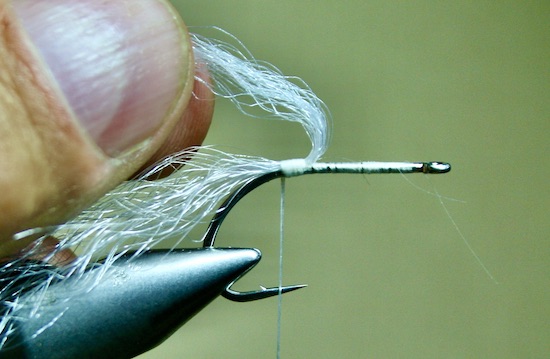
Bend the forward fibers back and tie them in too.
Making a whip finish over the wraps and then cementing them will greatly improve the fly’s durability.
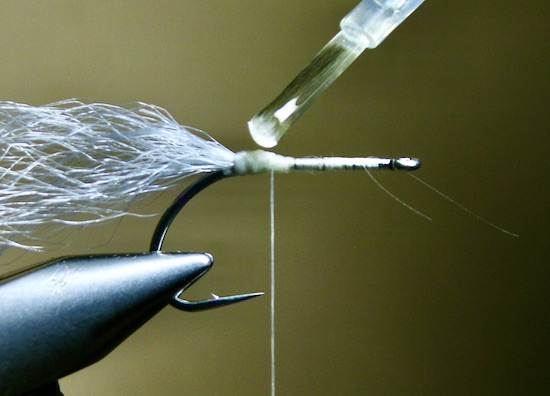
If the tail extends too far back, trim the excess. Keep the trimmings- you will use them later.
4. Cut three strands of Comes Alive off the hank. Double them around the tying thread and tie them in on top of the just-finished whip finish.
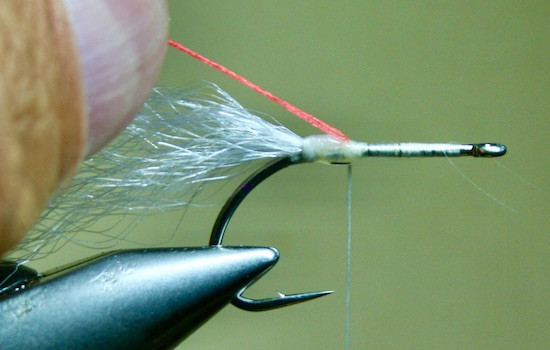
The Comes Alive adds a subtle accent.
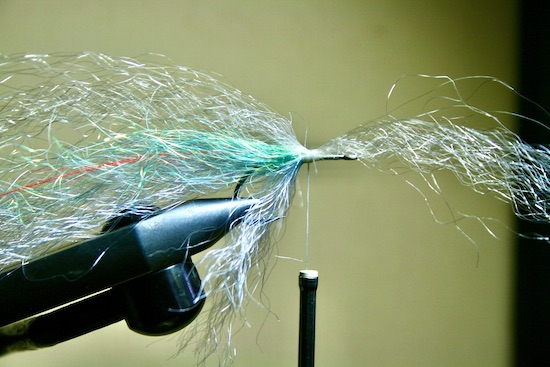
5. Get a sparse clump of Wing ‘n’ Flash, form it into a loose ball, and tie it in on top of the hook shank in front of the Comes Alive.
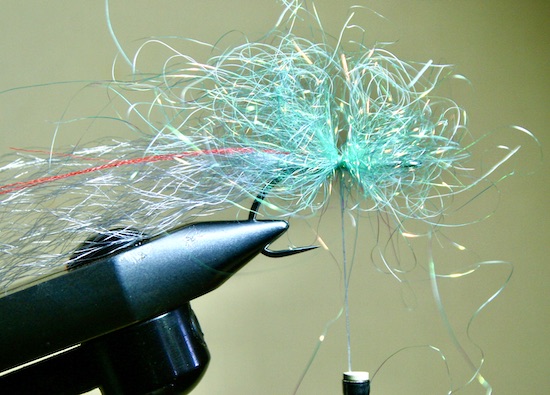
Pull the forward fibers back and make several turns of thread tightly in front of them. Make another whip finish and hit it with cement.
While the cement on the wraps dries, pick out the flash using an awl or dubbing needle.
While the cement dries, use an awl or or dubbing needle to pick out the flash, working from front to back. Use fingers to shape it, and pull out any fibers that are too long.
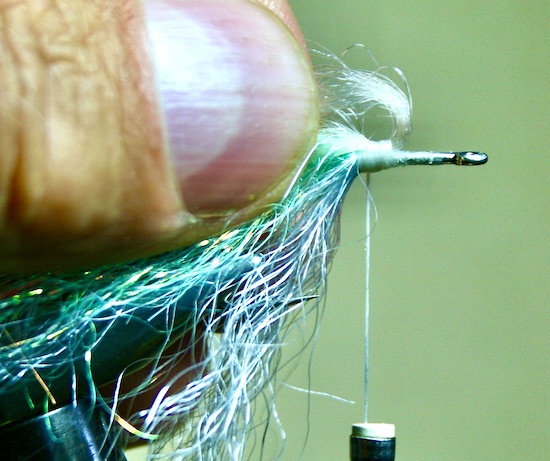
6a. Now tie in the “belly.” Take the trimmed fibers you set aside in step three. Angle them on your side of the hook such that the lower end extends past the point of the hook, and the upper end extends forward, past the hook shank, up into space. Tie it in.
Tie in a short fiber clump at an angle on your side of the hook. The lower fibers should extend past the hook point.
6b. Take those fibers extended above the shank, and fold them over the shank so they are extending past the hook point on the far side of the hook. Make enough wraps of thread to secure them. Whip finish? Not a bad idea.
The upper fibers are folded over the far side of the hook, also extending past the point, and are tied in. Another whip finish here is in good taste.
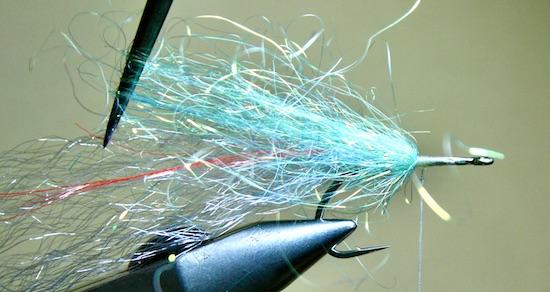
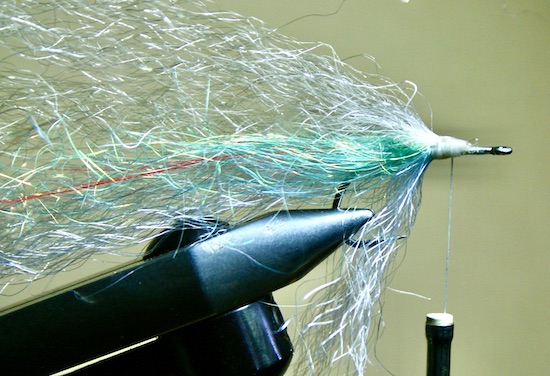
7. Cut a sparse clump of the second color of Kinky Fiber. Matching the length of one end to the length of fibers already tied in, tie it in in front of the last wraps. The excess extends out past the hook eye.
Getting the last part of the wing positioned.
Tie the fibers in.
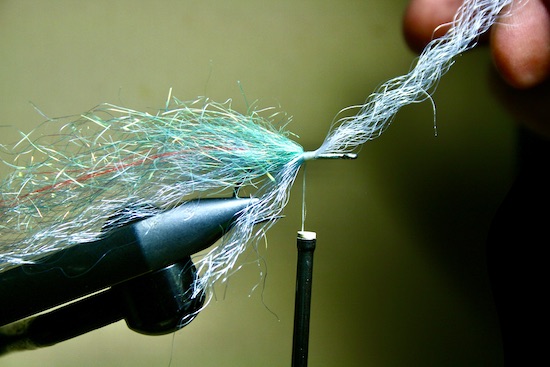
Fold the forward-facing fibers back and tie them in, too. Make a whip finish and cement.
Take those excess fibers, and, like in step 3, bend them back towards the bend of the hook. Secure them with the thread.
Almost done!
At this point you have a choice:
a) Taper, whip finish, and cement the head. Almost done! Skip to step 9.
b) tie in a double pronged monofilament weedguard.
Use hard mono for your double-prong weedguard.
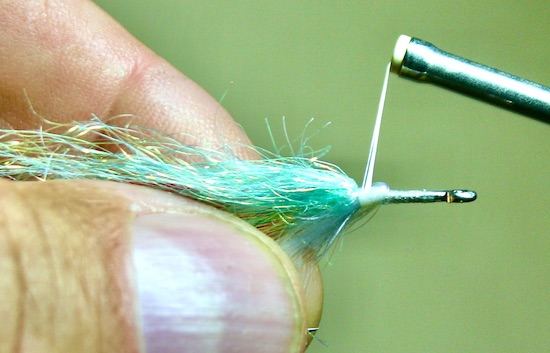
8. Cut a short (1.5 – 2 inches) piece of hard 15 or 20 pound mono. Double it on itself and pinch the bend hard to kink it. Put the bend over the hook shank in front of the wing and, making sure the prongs are in front of the hook point, tie it in with sufficient wraps to secure it.
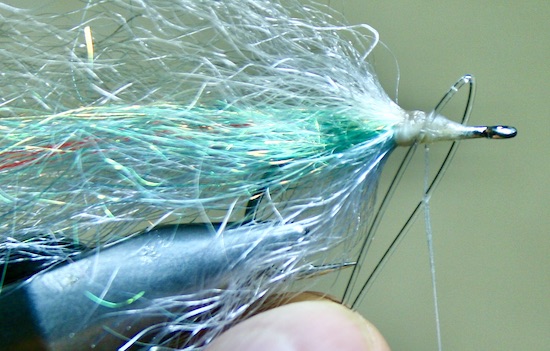
How it looks before wrapping.
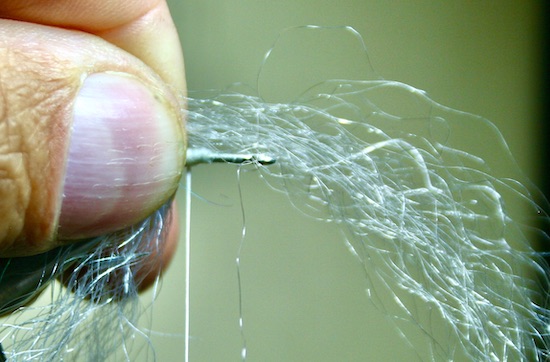
How it looks after wrapping and whip finishing.
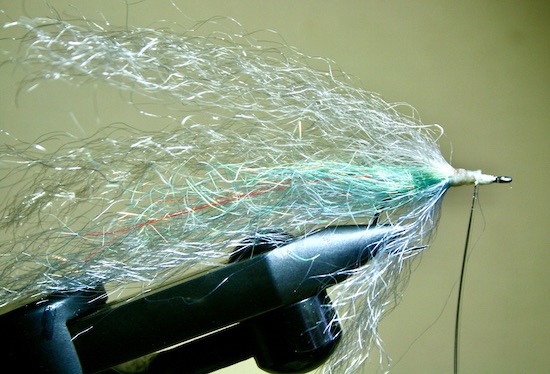
Taper, whip finish, and cement the head.
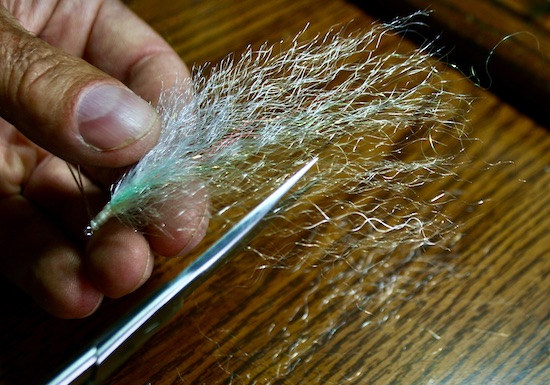
9. Once the head is dry, take the fly (which currently looks awful) out of the vise. Lie it down on a flat surface and use a fingernail brush to brush it out, front to back.
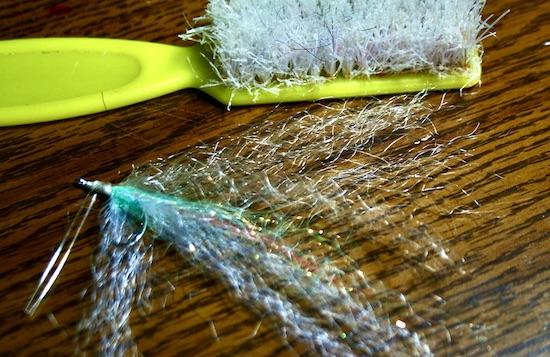
Use a fingernail brush to brush the fly out.
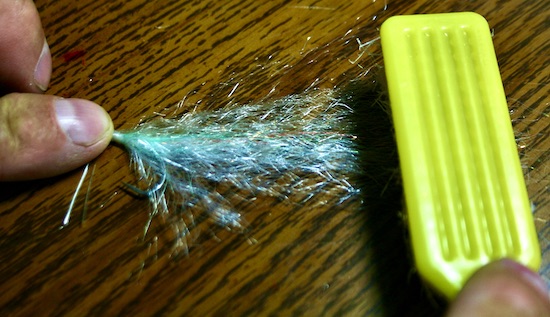
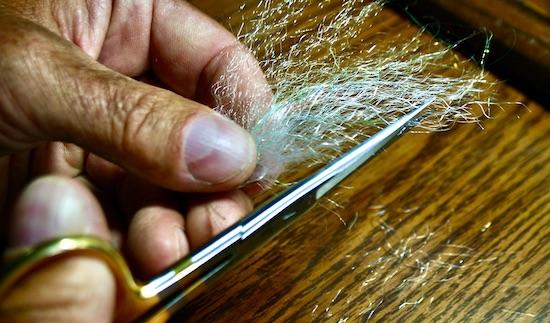
Then use your Dr. Slick scissors to trip the fly into a tapered minnow shape.
Snip carefully!
10. At this point, use Sharpie markers to make any barring you might want. I also use a red marker to add gill flash at and behind the hook bend.
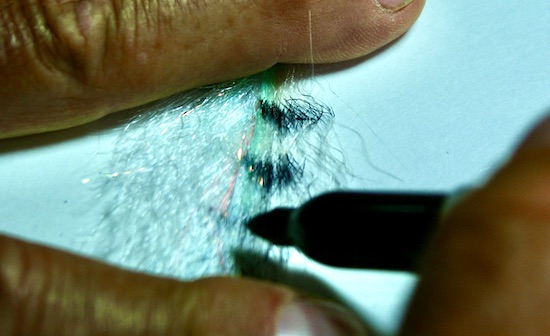
Mark it however you’d like, or not at all.
11. Get your holographic 3-D eyes and glue them on using Zap-a-dap-a-goo, Zap gel, or similar product. Once that glue is dry, the fly is (finally) ready to fish.
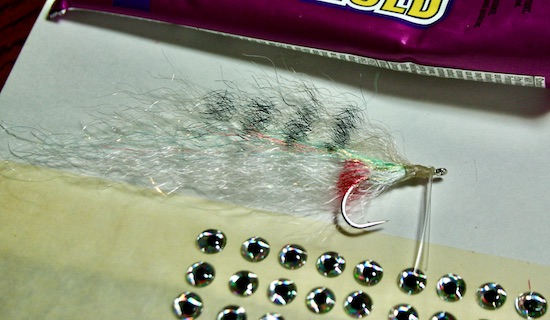
Glue 3-D eyes on to finish the fly.
This pattern is complicated and there’s a short learning curve. Your first two or three will look like hell, but they’ll get better. You can shorten that learning curve by keeping it sparse.
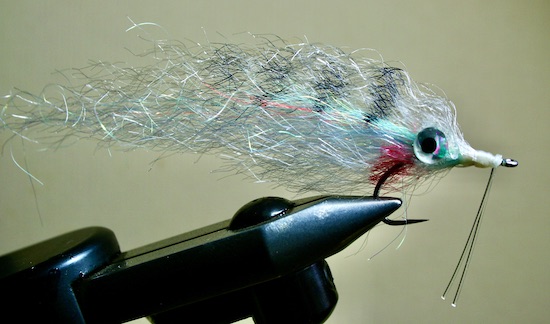
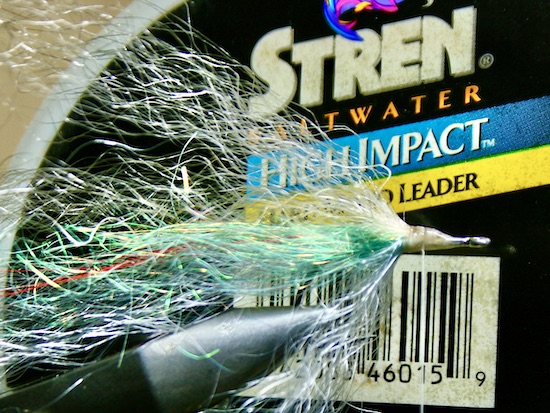
The finished fly. I forgot to trim the weedguard, which needs to be trimmed slightly below the hook point.
Hopefully, you see the need for keeping it sparse1
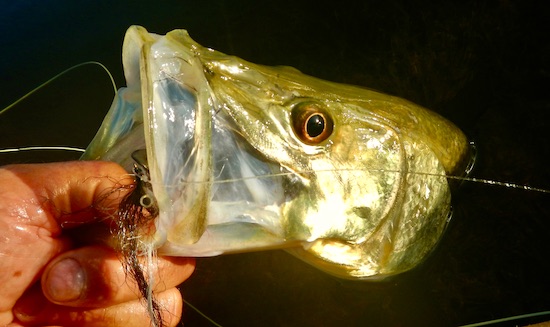
Any fish that eats smaller fish will take these flies!
I catch all kinds of fish on these flies in both fresh- and saltwater. Let’s face it- big fish eat little fish! So get that thing wet, and let me know about your success stories!
That’s how you go about tying the synthetic minnow!
John Kumiski
Copyright © John A. Kumiski 2022. It is illegal to reproduce or distribute this work in any manner or medium without written permission from the author, John A. Kumiski, 284 Clearview Road, Chuluota, FL 32766 (407) 977-5207.